Windows 8 was born with a lot of new features and features. One of them is Auto Maintenance, which allows automatic software updates, virus scanning, hard drive defragmentation and conducting system diagnostics at scheduled times. With the feature you can maintain the computer system easily.
![]()
Instructions for setting up automatic system maintenance in Windows 8
Change system maintenance time
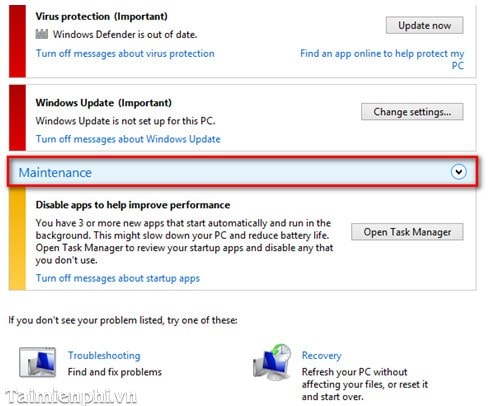
Step 1: Click the flag icon in the right corner of the Taskbar → Open Action Center

Step 2: In the Action Center window, navigate to the Maintenance section → click on the arrow on the right.
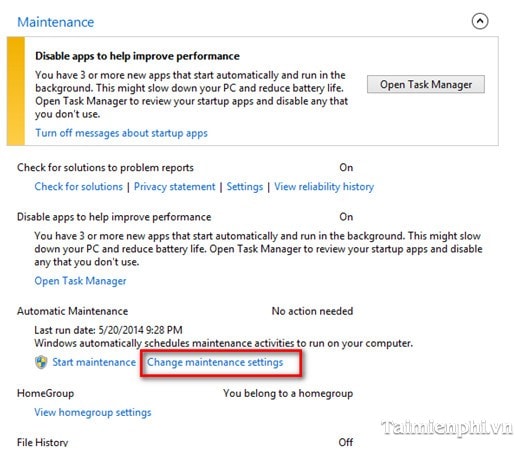
Step 3: Click Change Maintenance Setting.
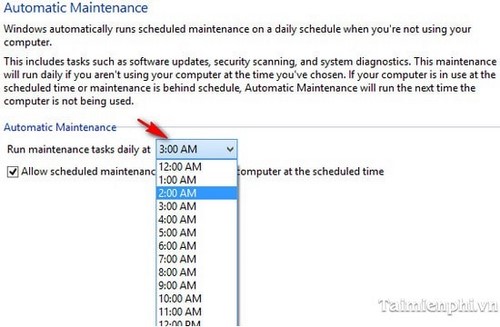
Step 4: Select again how long you want to run the system maintenance program. It also allows you to wake up your computer if it is plugged in during the time you have chosen to run system maintenance.
ENABLE/DISABLE AUTO MAINTENANCE FEATURE
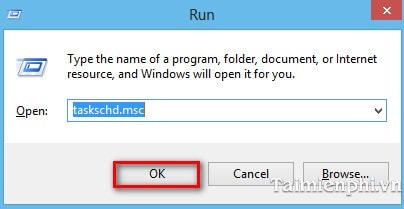
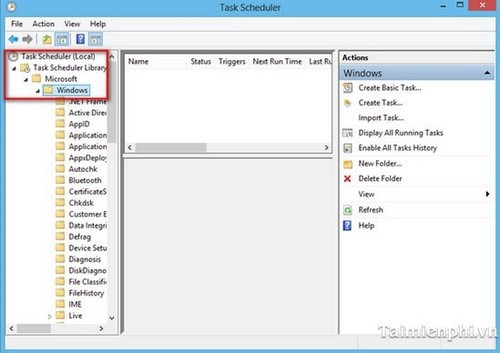
Step 1: From the Desktop, press Windows key + R. Type taskschd.msc → OK
Step 2: From the Task Schedule window, navigate to Task Scheduler Library → Microsoft → Windows → Task Schedule.
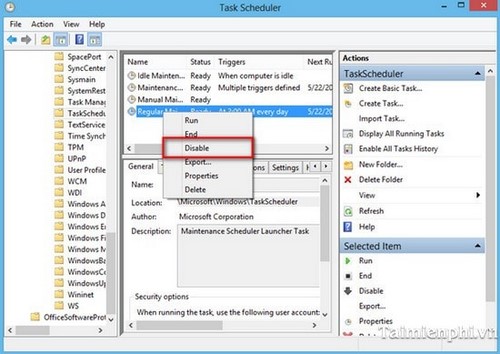
* If you want to disable the Auto Maintenance function.
Right-click on Idle Maintenance → Disable.
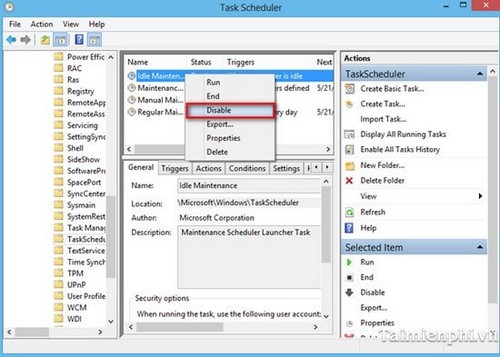
Right-click Regular Maintenance → Disable.
*If you want to turn this feature on
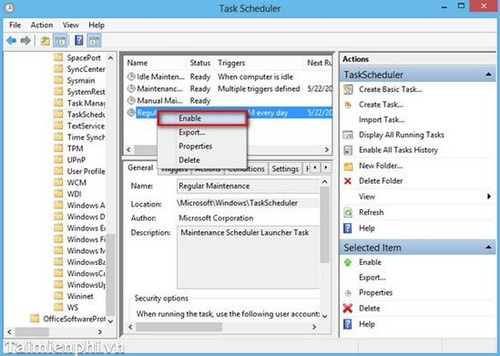
Right-click on Idle Maintenance → Enable
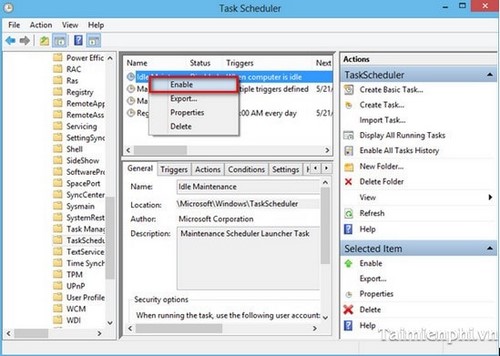
Right-click on Regular Maintenance → Enable
https://thuthuat.taimienphi.vn/tu-dong-bao-tri-he-thong-trong-windowns-8-1756n.aspx
Auto Maintenance function is a new feature on Windows 8 with the ability to update viruses, defragment hard drives, update … With the above tutorial, hopefully this feature will not be too strange to you anymore.